
Dairy-free Chocolate Recipe PLUS My Top Chocolate Making Tips
- Addicted to dates
- Jan 24, 2019
- 5 min read

Have you ever dreamt of being able to make delicious chocolate from the comfort of your home using only plant-based ingredients? Do you struggle to find a brand of dairy-free chocolate that you love? Are you more of a milk chocolate lover than dark chocolate connoisseur? Then I think I may have the answer! After lots of trials, tonnes of research and even more requests from you guys to make a dairy alternative chocolate, I'm very happy to share this next recipe with you.
From spending the last two years creating recipes, I have attempted my fair share of chocolate recipes over time. I've made versions that were too oily, not sweet enough, too bitter, too fudge-y and too soft.
This one however, is by far the closest thing to dairy chocolate I've ever made. You may remember the more fudge-y milk chocolate recipe which I released last year, and although it tasted amazing, the texture was too soft and lots of you wanted a recipe for chocolate that has the anticipated "snap" when you break a piece off from it. So what makes this chocolate more special than the others? Well, a combination of simple ingredients and careful consideration of the following 5 key areas when chocolate making...

TOP CHOCOLATE MAKING TIPS:
1. WATER IS YOUR WORST ENEMY
Water, and any other liquid that it. Traditional chocolate recipes are based on fats. If liquid is added to the mix this will cause the chocolate to seize. Basically your beautiful shiny chocolate will go dull and clump together. Although you make be able to recover the mixture by adding more liquid, at this point it will be a ganache or a fudge, and won't set like regular chocolate. So remember, the most important thing when creating a chocolate recipe is to AVOID LIQUIDS at all costs.
2. BLENDING IS YOUR FRIEND
Avoiding adding water based liquids such means that it's also a good idea to avoid using liquid sweeteners such as maple syrup or agave. Although, I haven't yet tested out their effects on this particular recipe, the sweetener which I opted to use was coconut palm sugar. You could also try using another type of granulated sugar, just make sure you blend it into a very fine powder to ensure that the texture of the chocolate doesn't end up too gritty.
3. CACAO NIBS FOR THE WIN
With this recipe, I opted to use cacao nibs, roasting them from scratch instead of using cacao powder as I did in all my previous recipes. The result is a game changer! The cacao nibs contain both the cacao solids and cacao butter. Dry cocoa solids are the components of cocoa beans remaining after extracting the cocoa butter, the fat component. When roasted and blended the cacao nibs convert into a liquid state or cacao paste, otherwise known as cacao liquor. Personally, I have found that the chocolate made using cacao nibs blended into a paste sets much better than when using a combination of cacao powder and cacao butter. There is also something very therapeutic about smelling freshly toasted cacao nibs, similar to roasted coffee beans, the scent will fill up your house so beautifully that you may mistake your kitchen for Willy Wonka's factory!
4. MAKE IT SHINE
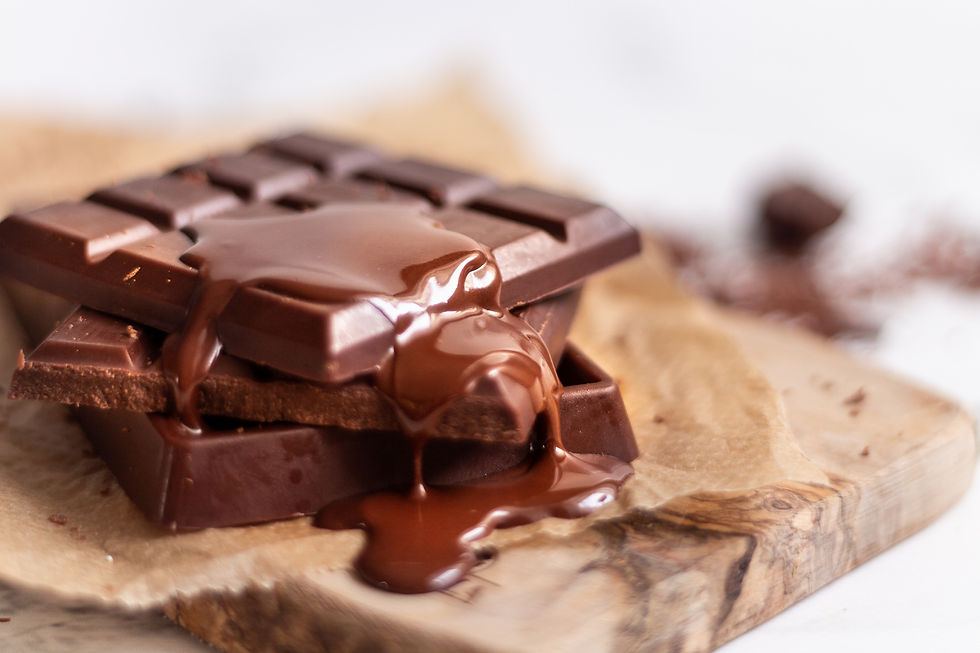
Have you ever wondered why some chocolate is shiny and snaps when you break off a piece? The shine in chocolate is traditionally created by "tempering" which is the process of melting and cooling chocolate in order to form beta crystals in the cacao butter. Some cheaper brands of chocolate skip this method and coat chocolate with shellac, which is a resin secreted by the female lac insect!
If you've ever considered tempering chocolate before, chances are this may be something that you have avoided thinking it was a task only cut out only for master chocolatiers. I am 100% guilty of this, and although I'm not going to sit here and lecture on the correct way to temper chocolate, as it is very much an art and I still have a lot to learn, in the below recipe I will share with you how I was able to get a nice shine and snap from the chocolate without too much effort!

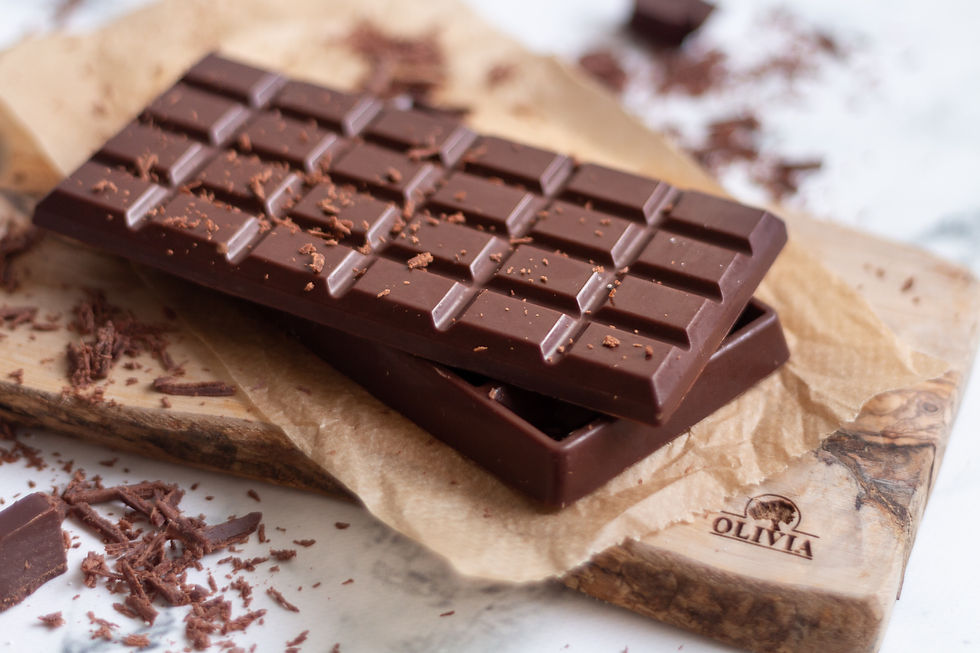
Dairy-Free Milk Chocolate
Set time: 2 hours
Prep time: 45 minutes
Total time: 2 hours 45 minutes
INGREDIENTS
180g (2 cups) Cacao nibs
150g (1 cup) Coconut sugar
125g (1 cup) Coconut milk powder (can be found in most Asian speciality shops)
218g (1 cup) Cacao butter (divided into 2 parts
1.42g ( ¼ tsp) Himalayan pink salt
INSTRUCTIONS
Add the coconut milk powder and coconut sugar to a blender or food processor and blitz until a fine powder.
Pass the powder through a sieve.
Place the powder in a bowl and set aside for later.
Preheat your oven to 100℃ (212°F).
Line a baking tray with a silicone sheet or parchment paper and spread the cacao nibs out on top of it.
Roast the cacao nibs in the oven for 10 minutes.
Once ready, remove the cacao nibs from the oven and place them in your high speed blender
Blend, blend, blend! You want the cacao nibs to turn into cacao paste, otherwise known as cacao liquor. This should take approximately 5 minutes or so.
Meanwhile place ½ of the cacao butter in a bowl and melt by sitting on a saucepan of simmering water (known as a bain-marie). Ensure that the bowl is larger than the circumference of the pot and that NO WATER accidentally slashes into the cacao butter.
Once melted, remove from the bowl from the heat.
Slowly add the cacao butter (little by little) to the blender with the cacao paste, blending to incorporate the mixture in between adding more. Continue until you have added the entire ½ cup to the mixture. Again be very careful that no water accidentally makes its way into the mixture throughout the entire process or it will cause the chocolate to seize.
Continue blending the chocolate for 2-3 minutes.
Add ½ cup of the coconut sugar/coconut milk mixture to the blender and blitz for 30 seconds.
Continue adding the coconut mixture in ½ cup increments until the entire quantity has been used, blending for 30 seconds at a time to slowly incorporate the mixture.
Taste test the consistency of the chocolate, if it is too gritty for your liking, continue to blend until it is smooth. This can take another 5 minutes or so.
Place the chocolate mixture into a large bowl and sit it on top of an ice water bath and add the remaining cacao butter. Continue to stir until the cacao butter has melted into the chocolate. This additional cacao butter acts as a “seed” and will help to ‘temper’ the chocolate by bringing the temperature down quickly.
Bring the temperature of the chocolate down to about 113° F (40 – 45° C) . If you don’t have a thermometer, spoon out a little chocolate, it should be Luke warm to the touch.
Pour it into the desired moulds (I use silicone ones).
Place the chocolate in the fridge to set until hard (1-2 hours)
Remove the chocolate from the silicone moulds and store in an airtight container at room temperature.


Hello !
It's the first time I'm searching your site because I want to make mylk chocolate and I'm really impressed.
The photos are beautiful and all the recipes are mouth-watering.
Coming back to this recipe in particular, do you think I could replace the same quantity (gr) of cacao nibs with 100% chocolate? From what I understand, 100% chocolate is just toasted, blended and set cacao nibs.
I'm still learning chocolate making and I do love my dark bitter chocolate but sometimes it's nice to have something sweeter.
Thanks in advance !